 by b-organics-admin
- Uncategorized
- May 15, 2020
- 1,074
- 0
Did you know that marshmallows were originally made with angel wings and love? Ok, not really, but they were made with marshmallow root!
Today, store bought marshmallows are basically synthetic yuck. They might taste really good, but you’ve never really had a marshmallow until you’ve had one of these bad boys!
You can add lots of treats to these, and one of my faves it adding kava tincture!
Marshmallows are fun and can be made with as few as five ingredients: egg whites, water, gelatin, cream of tartar and honey.
Now, I’ve been attempting to create the perfect marshmallow for at least six months and I think I’ve just about got it down.
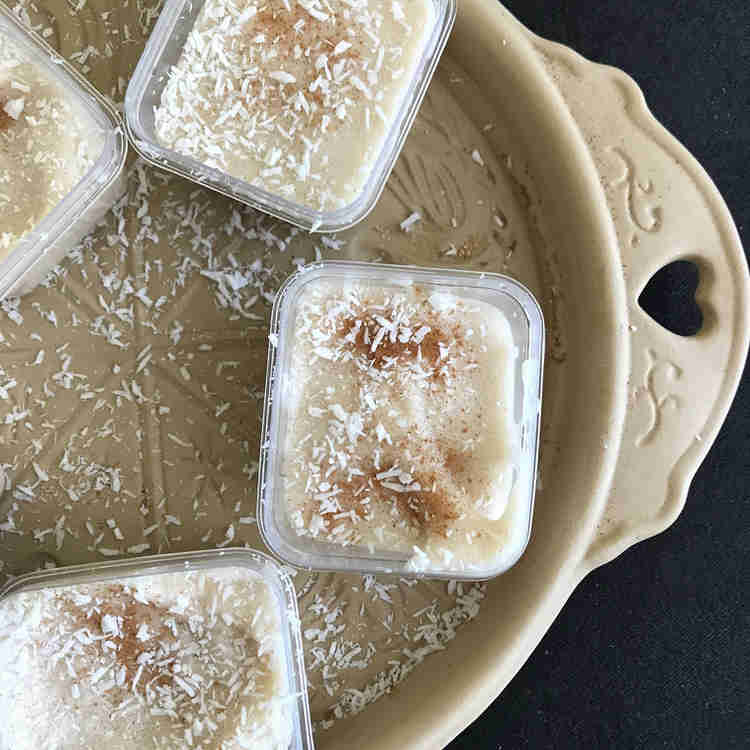
So last night I created an amazing batch of marshmallows. This was truly a masterpiece in the marshmallow arena, if I do say so myself!
MARSHMALLOW TIPS
Now, marshmallows can be tricky. The secret to my recipe is leaving out the corn syrup and adding two egg whites with cream of tartar into the mixture once it’s almost whipped.
According to Harold McGee’s On Food and Cooking, the secret lies in whipping air into a mixture of sugar syrup and gelatin – the protein molecules in the gelatin collect in the bubble walls, and this reinforcement, together with the viscosity of the strip, stabilizes the foam structure, keeping the air in as the mixture cools. “Marshmallows are, like many so things involving eggs, a lot easier to master once you understand the basic chemistry involved. Egg white, though traditional, is not vital here, but does give softer, more delicate results. As the name suggests, the first marshmallows were set with the mucilaginous root of the marsh mallow plant. These days, gelatine is preferred, though agar-agar, derived from algae, is sometimes used as a vegetarian alternative,” writes Felicity Cloake for The Guardian.
*I personally find that adding a sort of meringue mixture of 2 eggs whites + cream of tartar during the last minute and a half of whipping gives the marshmallows an added fluffiness that I simply must have in my marshmallow, but you don’t have to do this. If you choose this method, simply make a meringue and add it to your syrup as it is heating.
You can find ingredients on Amazon. It really doesn’t matter which brand you use, just try to use organic, where possible, as budget allows. We’ve provided some links for you.
Ingredients
- 1 cup water divided into 1/2 cups
- 3 Tbsp Grass Fed Beef Gelatin (click the link to use the brand we love!)
- 1 cup honey
- 1 tsp Vanilla Extract
- Coconut Oil
- Arrowroot starch
- Marshmallow powder (optional)
- (Optional meringue mix using 2 egg whites)
- Beaufort Kratom kava kava tincture
Instructions
- Line an 8×8 pan with parchment paper in both directions, leaving overlay on all sides to use as handles to remove the marshmallows when they’re done.
- Lightly grease the parchment paper with coconut oil and sprinkle with a layer of arrowroot starch or other coating of choice.
- In the bowl of a stand mixer, add the gelatin with 1/2 cup of water. If using a hand mixer use a large bowl for this.
- While the gelatin is softening, pour the other 1/2 cup of water in a sauce pan along with the honey and the salt. Turn the burner on medium heat. Slowly bring the mixture to a boil. Place a candy thermometer in the sauce pan and continue to boil the mixture until it reaches 242 degrees (or the soft ball stage). Don’t go over 245 degrees. *NOTE* If you’re making these at elevation, decrease the cooking temperature by 2 degrees per 1,000 ft.
- This could take about 10 min up to 25 minutes depending on how hot the burner is and the size of your pot.
- Note: If your pot is too big the sugar syrup will be more likely to burn as the temp will rise too quickly and the thermometer will have trouble reading correctly. If the honey mixture foams up, watch it closely so that it doesn’t over flow. You can use a spoon to break up the foam but try not to stir the actual syrup.
- When it reaches 240-242 degrees, immediately remove the sauce pan from the heat.
- If using a stand mixer, turn it on to low/med. Pour the honey mixture into the bowl in a slow steady stream down the side of the bowl, combining it with the softened gelatin. Pouring “slow” here is very important, otherwise the sugar syrup will be too hot when it hits the gelatin causing the marshmallow mixture to break later when you try to spread it.
- Be sure that the syrup and the gelatin are well combined before moving to the next step. If you need to you can even stop and stir the gelatin when half of the sugar syrup is poured, making sure it is getting mixed in and resume pouring.
- If using a hand mixer you may want to let the sugar syrup cool down to 225-230 degrees before adding to the gelatin. This is because it is much harder to pour at a slow steady stream while holding a hand mixer.
- Turn the mixer to high and continue beating until it becomes thick like marshmallow creme (about 7-10 min). These times will vary depending on the mixer and event the size of bowl used. Either way the marshmallow creme should be cooled down.
- Add the vanilla a few minutes before it’s done mixing giving it enough time to mix in completely.
- Turn off the mixer and transfer the marshmallow creme to the prepared pan. Smooth the top (add more coating if using one). Pat to smooth again if needed.
- If you are not using a coating then lightly grease your hands with oil and pat smooth.This will help keep the marshmallow cream from sticking to your fingers. Alternatively you can press it down with parchment paper, leaving it there till the marshmallows are completely set.
- Leave the marshmallows to set anywhere from 1 hour to 4-6 hours depending on your gelatin, temp of the syrup and how set you want them. If you want them to look nice and clean after cutting, wait at least 4 hours, even if they seem set.
- When set, remove the marshmallows by lifting from the parchment paper flaps.
- Cut to desired size and add more coating while cutting if needed and toss them again in some starch once cut for a super nice finish.
- For best results allow marshmallows intended for roasting to dry extra long. Once cut, leave them out, covered with a cheese cloth overnight.
- Store in an airtight container (jar, bag, container, etc) for 5-7 days, not that they will last that long…
- Other coating options: Try all kinds of crushed nuts, coconut, almond flour mixed with spices, cocoa or other starches.
- Note: Using a starch works best for coating marshmallows that will be used for roasting or topping sweet potatoes. It helps them to dry out faster and the extra starch helps with the browning process.
- If you want to dip the marshmallows in chocolate, melt you chocolate of choice, let cool slightly, and either dip the bottoms or drizzle the chocolate on top. Stick in the fridge for about 5 minutes to let the chocolate harden, then store as mentioned above.
Notes Recipe from http://www.mommypotamus.com/homemade-marshmallow-recipe-gaps-paleo-scd/